Square Deal 'B' Spent Primer Catch
Upgrade Installation Instructions.
Please read through all of the steps before beginning.
|
To download these instructions in PDF form CLICK HERE (to Save File, right click the link and select "Save Link As") |
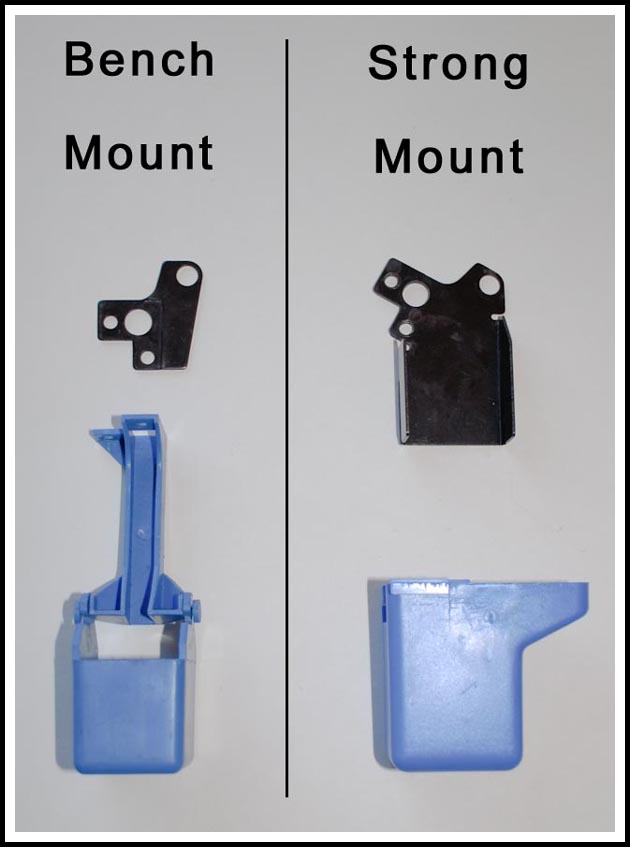
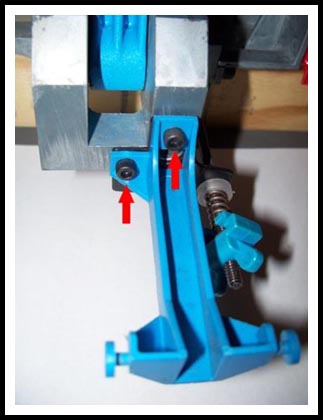
Your Square Deal B should have either one or the other stock spent primer setups shown above. The one on the Left is the standard bench mount system that came stock on older presses, the one on the right is for use with a strong mount. The new Upgrade will work with either system and will reuse the metal return bracket. If you use the strong mount and your press is too far away from the edge of the bench though you may have some issues with the bending of the hose.
Choose the setup on the next step that works for your press.
|
|
............Bench Mount..........or .....Strong Mount
 .......... ..........
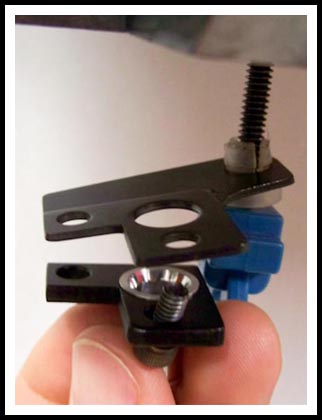
Start by removing the stock Spent Primer Chute......................... Remove the two screws that hold on the
by removing the 2 screws shown above. .....................................Spent primer cup/Return Bracket.
|
 ........ ........
.........Bench Mount.......or ....Strong Mount
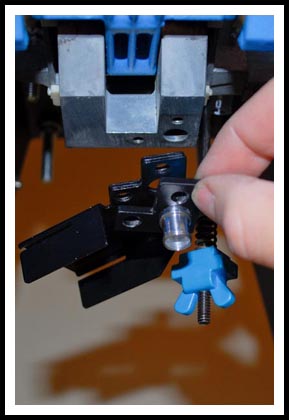
Insert the funnel into the new bracket and align the new Bracket with the stock Return Bracket. (as shown above for your particular setup.)
|

(Bench mount shown)
When tightening the screws make sure the Return Bracket and the New Funnel Bracket are aligned with the press bottom so that both edges (shown by the red arrows) clear the handle when the press is cycled.
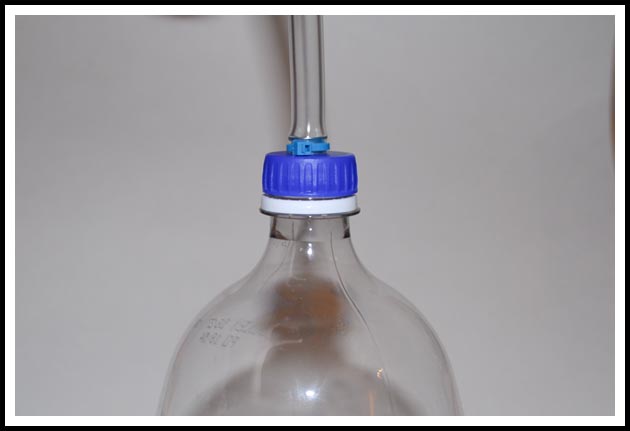
Next attach one end of the Hose to the end of the Funnel, the other end will be attached to a suitable container on the floor. Soda Bottles are the easiest container to use (as they are large enough that they rarely have to be emptied) so I am including a pre-drilled soda bottle cap and bottom hose fitting. If you do not want to use a soda bottle the lower fitting can be used with any container by just drilling a 13/32 hole in the top of it.
You will probably have to trim the hose to length depending on the height of your bench, route of the hose, and location of your container, when trimming the hose make sure you take into account the height of the bottle or container that you have selected, also make sure the hose has a little slack so it doesn't bind as the platform is raised and lowered.
If you use a strong mount and it is mounted to far back from the edge of your bench and you have trouble with the hose kinking on the edge, one solution is you may be able to drill a hole the bench top and run the hose through this hole.)
|
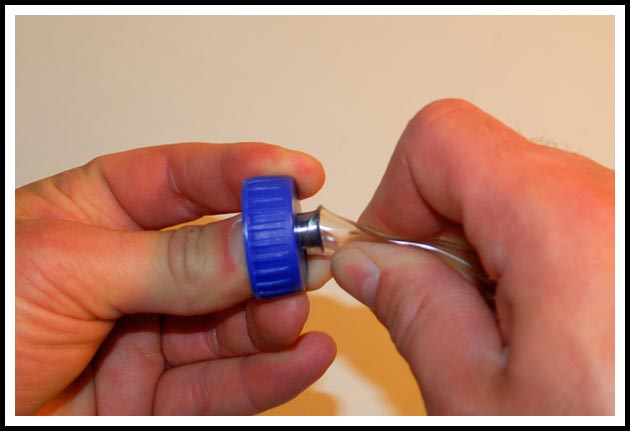
If using a soda bottle double check that the supplied cap fits your bottle before continuing. Insert the bottom hose fitting (the smaller of the two fittings) through the bottom of the cap, it might be a tight fit and inserting it at an angle and then snapping it in is usually the easiest method here.
|
While holding the fitting in with your thumb with one hand attach the hose to the top of the fitting by squeezing the hose near the end and while pressing it on at an angle, give the hose a slight twist and it should pop right on. Be sure you measured your hose and trimmed it to the correct length for your setup before starting this step. Once again don't forget to account for the height of the container that you have selected.
|

Secure the hose to the fitting with the zip tie and trim off the excess with a pair of snips.
|
Then just screw the cap on to your soda bottle (not supplied) and enjoy some loading, you should now never have to pick spent primers off the bench or floor again.
|
Enjoy, you should now never have to pick spent primers off the bench or floor again. If you have any questions, comments, or problems please contact me at stevethone@comcast.net
|